How to organise your mind with Pinterest. (Part 1)
Hi Home Lovers!
Today is Part 1 of how to use Pinterest to organise the overwhelming thoughts in your mind, as you try to create a clear vision of your dream home!
You want to create a one-of-a-kind beautiful home that expresses your unique style, so when you're finished you're going to breath a sigh of relief. This home is exactly YOU!
But whenever you jump on Pinterest and start searching for inspo pics you end up overwhelmed. You like so many different styles - you've got no focus. You're feeling confused and scared you're not going to be able to pull all your ideas together - into one clear picture.
And the greatest fear - not achieving the home design you have in your heart, the one you want to share with the world. It's like a self portrait and you're so scared you're going to paint it wrong!
“It's like a self portrait and you're so scared you're going to paint it wrong!”
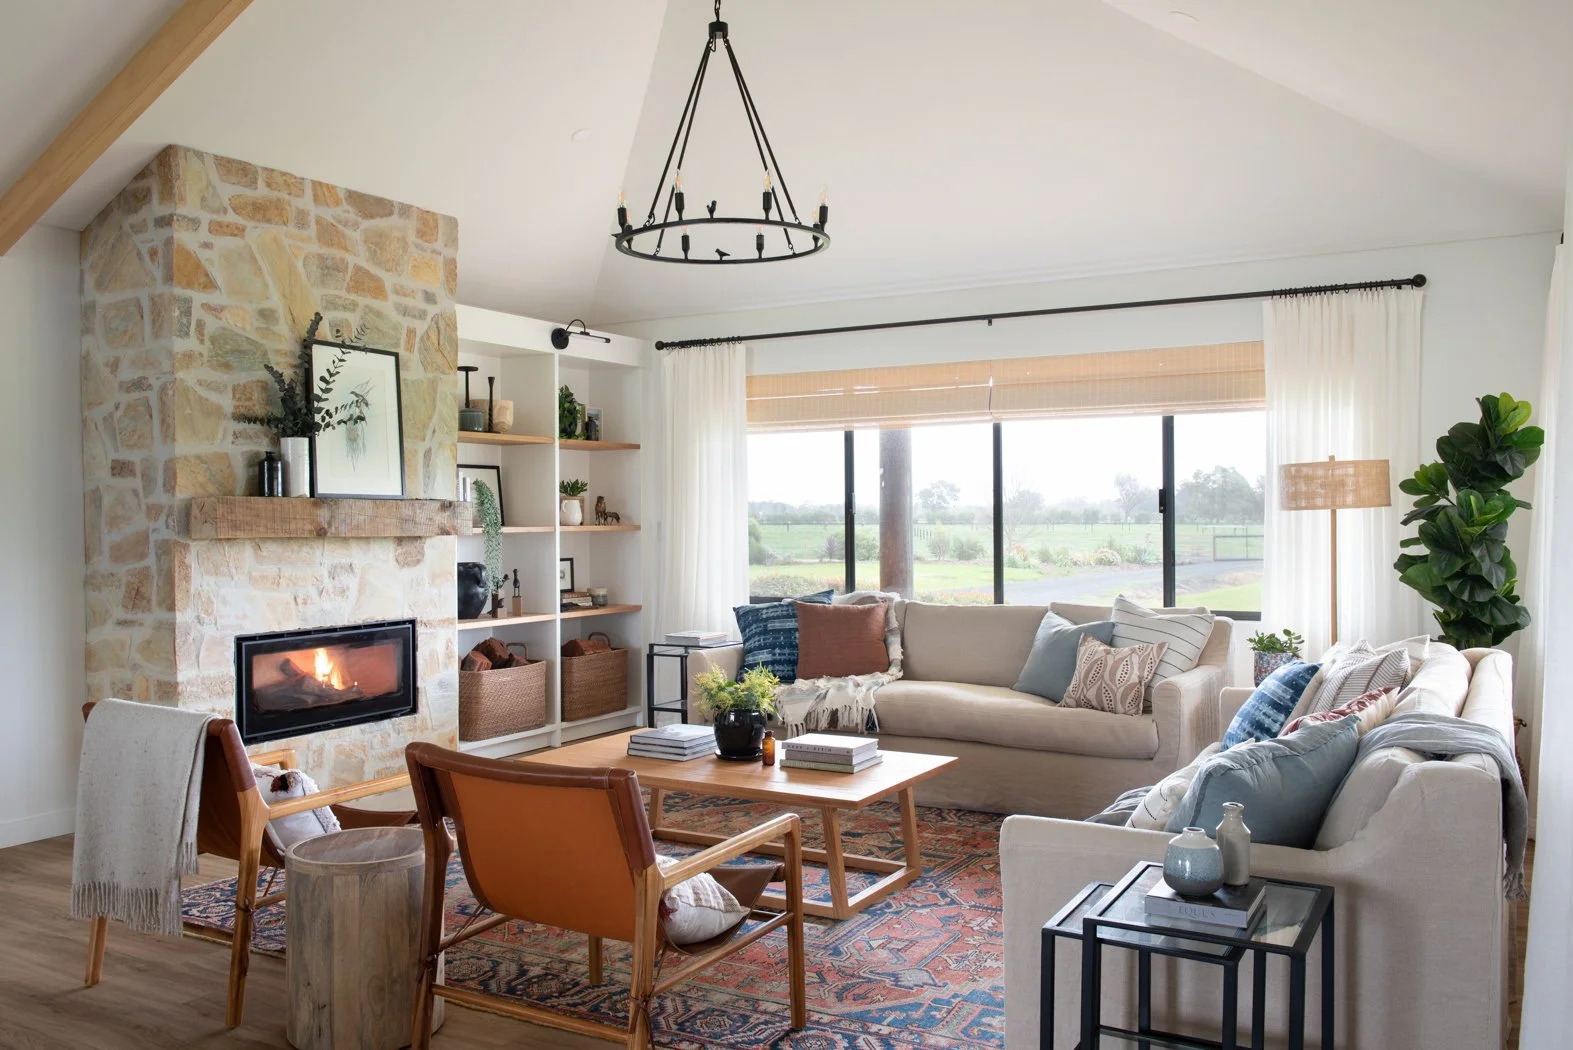
Our client’s styles are a unique blend (Linda Woods Design - Photography by Gathering Light)
I understand just how you feel - my clients express this to me all the time and I've felt it myself. Creating a vision for your dream home is not an easy process.
I have a major advantage - I've worked for 30 years in all areas of home design. From interiors, to exteriors, to landscaping. There's a lot of moving parts and I understand how they need to work together.
So let's get YOU focused!

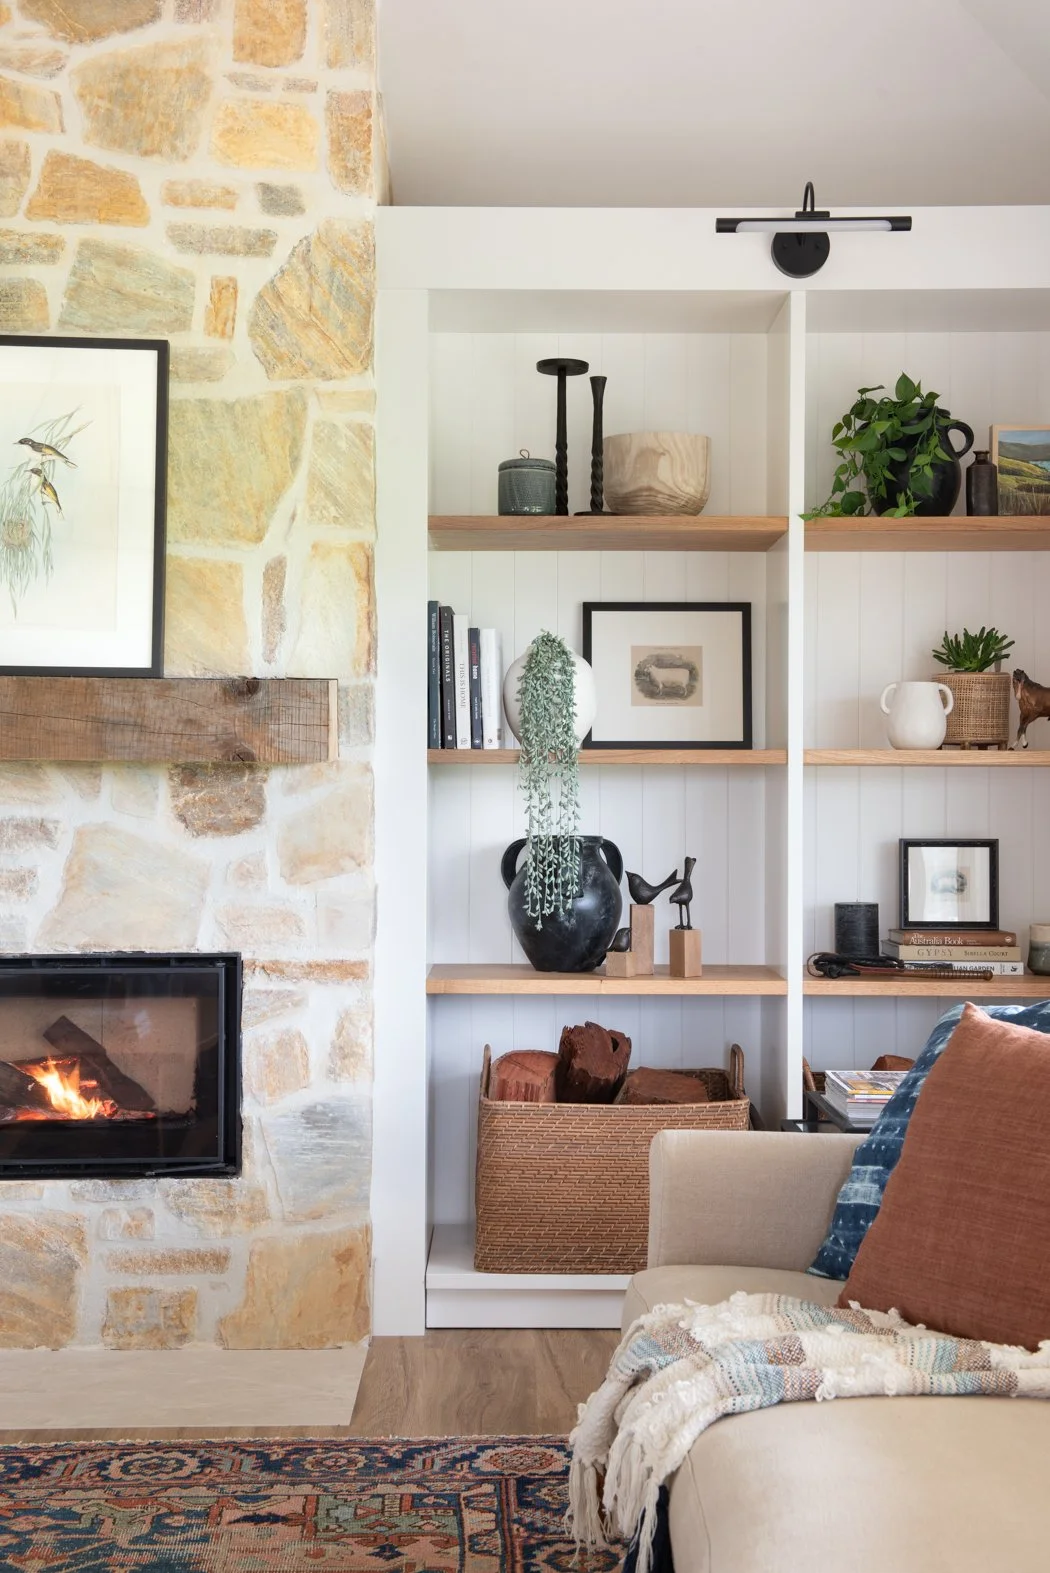
Focus on the interior shell first. (Linda Woods Design - Photography by Gathering Light)
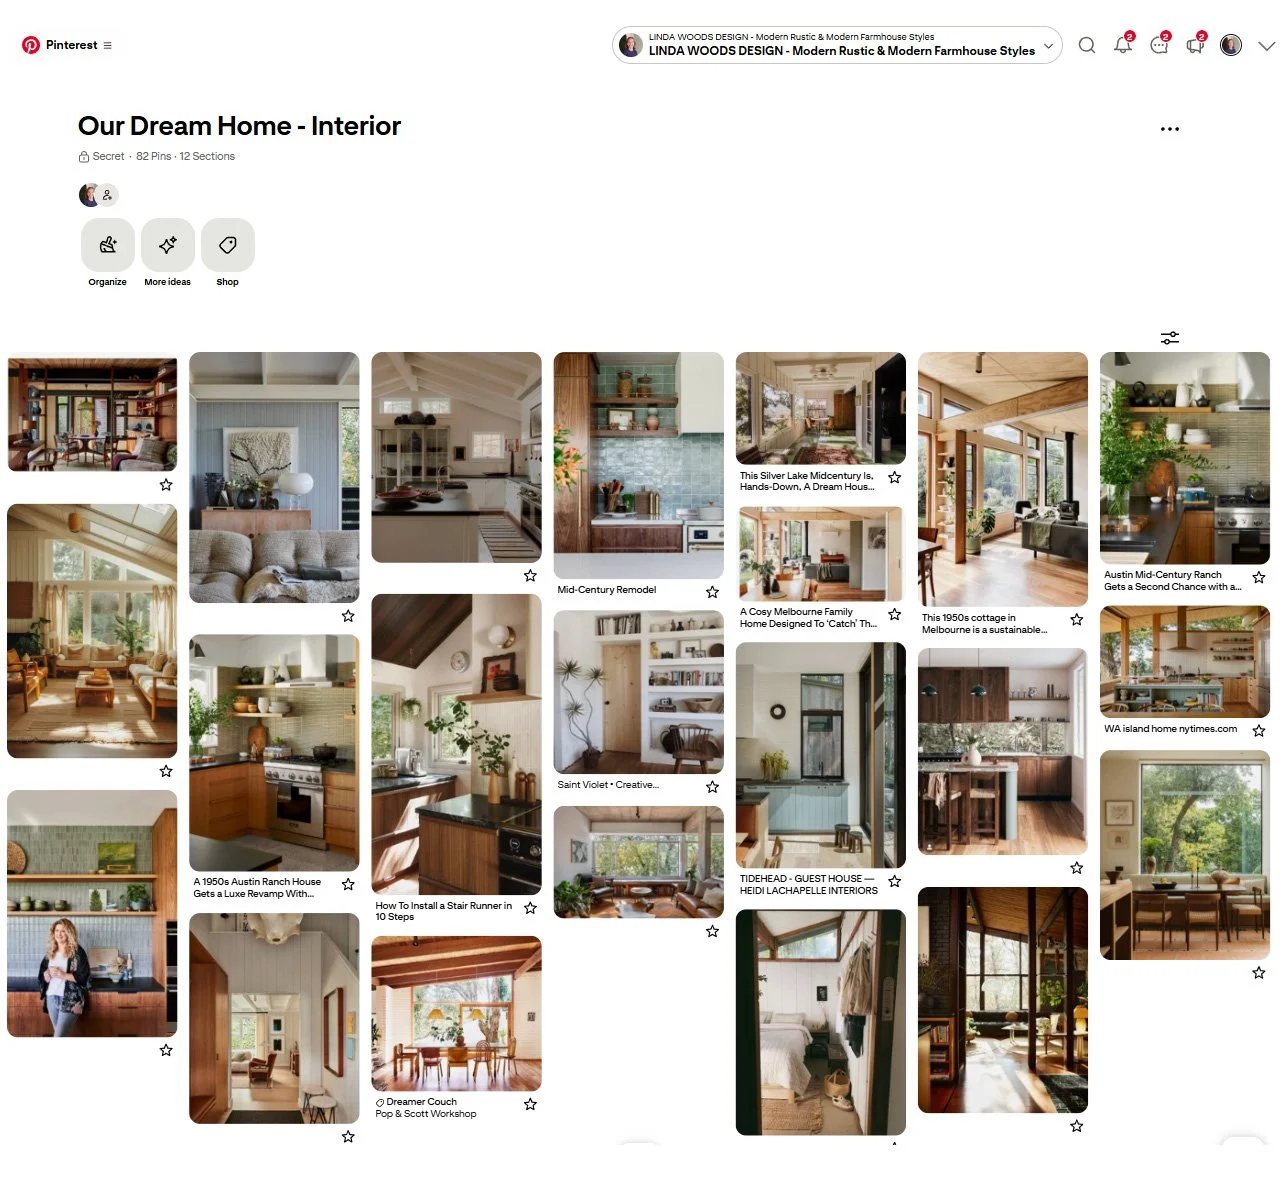
The most important goal starting out is to identify what are the core "style" bones you're attracted to - both inside and outside. So start by setting up an INTERIORS and EXTERIORS board. Now let's start with the interior shell first.
1 - Flow
If you've already got a Pinterest board full of choatic imagery then jump to Step 2. But keep this Step in mind for future pinning.
Firstly, we need to get you in the FLOW. So just start pinning whatever grabs your fancy. Don’t think too much about “is it possible”, “hubby won’t like it” or “it’s going to break the budget”, etc.
Caveat - you have to love the image, there has to be a really strong attraction - even if it’s only one part of the image. You've got alot of work to do in the next steps so don't create any more clutter then you need to.
Just let your creative juices flow and pin what you love on the separate INTERIOR & EXTERIOR boards.
2 - Organise
Now if we just stopped there, you’ld have a pretty confusing vision. It may look nice overall, but could you describe in specific detail exactly what you do and don’t like? No - there’s too much conflict. So now it’s time to get organised.
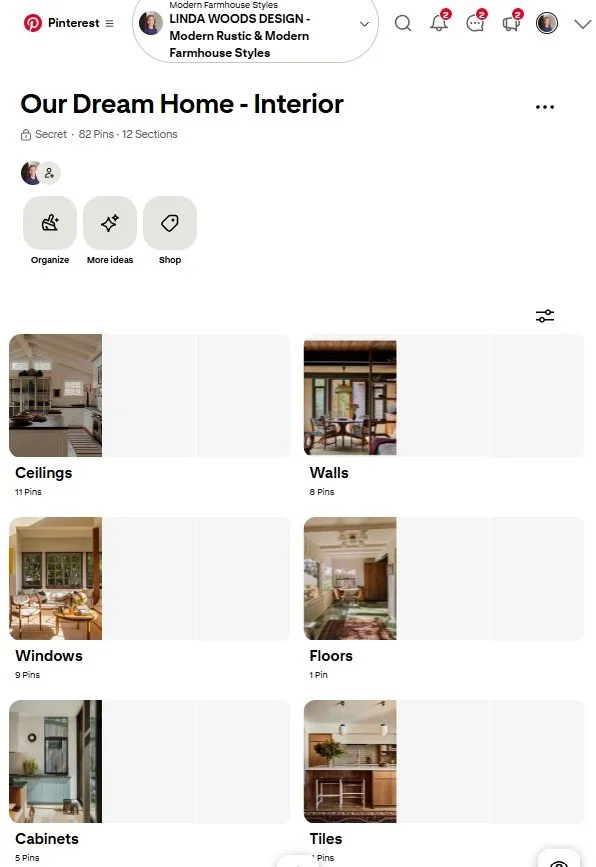
Create several Sections on your INTERIORS board and label them, for example... windows, ceilings, doors, floors, walls. Forget about the furnishings for now, think about the elements that wrap the internal space.
3 - Zoom In
This is the most critical and insightful step. You’ve got to decide in which Section each image belongs!
Zoom in on each image and ask yourself - what is it you’re most attracted to. Really trust your instincts and cover up areas of the image if it helps to zoom in on different elements. Eventually your brain is going to work out what you’re connecting with and you’ll start seeing similar elements pop up again and again.
Clients often say I like the “overall image” - but an image is made up of lots of little details. So get specific!
4 - Filter
It’s during this process that your going to find out if you REALLY love an image, or if its just the overall look and feel you like. Unless you love it - it’s going to be a distraction. Colour is one of the strongest attractions we have - so often you’ll be loving a colour, or maybe a texture, but that’s all and the rest of the image is blah.
So either delete if it’s not a love, or move it to the relevant board. If you love the colour, put it on the “Colour” board. The goal is to categorise every image you started with. You must have a strong reason why you love what you love!
5 - Identify
Through this continuous process - eventually you’re going to feel an increasing sense of harmony in each Section. No longer a hodge-podge of imagery that overwhelms the mind. But a consistent blend of imagery with a common thread flowing through. The more concise you are about your image selection the clearer this will be. Get ready for your A-HA moment!
In Part 2 we’ll move outdoors and complete the process of identifying your style bones.

“Clients often say I like the “overall image” - but an image is made up of lots of little details. So get specific!”
I run through this process with all of my clients, when we first meet and throughout the project. Constant searching and refining, digging ever deeper into the details. It's the only way to create a truly authentic and one-of-a-kind home.
The goal for our clients is when a project is complete, they feel like they designed it themselves. Every detail they feel like they had some part in selecting and crafting.

DESIGN TIP: CAPTURE YOUR THOUGHTS
As you follow this process, be sue to capture your likes and dislikes - either in the Comment section of Pinterest or now that Pinterest no longer has private Notes - start a Word or Notes doc.
Paste across your pics and note down exactly what you do and don’t like about them. You need to capture your detailed thoughts - they are a window into your soul!
So don' t allow yourself to get pidgeon-holed into accepting "typical" design. A set of “standard” details that have nothing to do with your unique style or story.
You may be feeling overwhelmed and confused now, but with some organisation and trust in your intuition you're going to see your own unique HOME-STYLE emerge.
Time to get focused, get strategic, learn about yourself and exactly what inspires you. So when we meet up you'll be able to share with me exactly what you love, or any other designer/builder you work with.
We’ll get into the EXTERIOR in Part 2.
Linda XO

linda woods - interior designer
Want to discover your Home-Style?
I can’t wait to learn your home story and create a beautiful vision for your dream home. Let’s get started!